Print Test Cards and Rosters
Depending on your user role permissions, you can print student test cards and roster sheets from the Administration Card in Test Management > Administrations (for those users who log in to ADAM) or by going straight to the Proctor Dashboard. For administrations with multiple proctor groups, test coordinators can print the cards for all proctor groups or for a specific proctor group. See also: Administrations
Follow the appropriate steps below.
From the Proctor Dashboard
Users with access to the Proctor Dashboard Print Cards option can:
1. Go to Proctor Dashboard for a proctor group. See Proctor a Test.
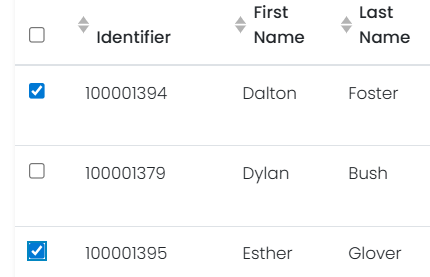
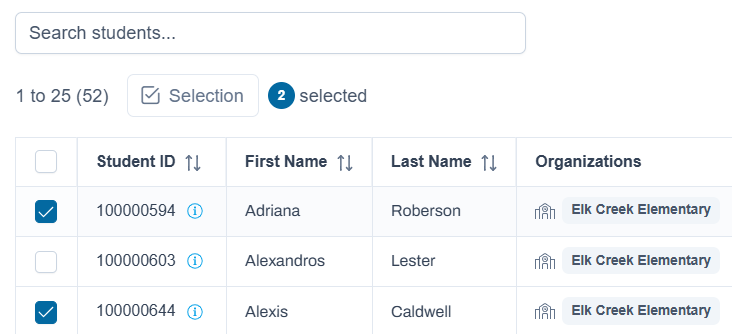
2. To print cards for only some students, select their names. If no selections are made, all students will be included.
Classic User Interface:
Updated User Interface:
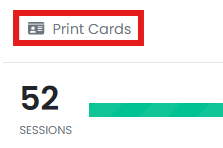
3. On the Proctor Dashboard, select Switch to Print Cards View (top-right corner of the page).
Classic User Interface:
Updated User Interface:
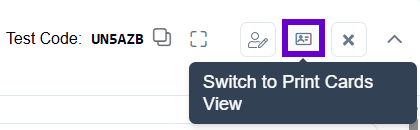
4. Select from various formatting options. More options can be accessed by clicking Settings.
Classic User Interface:
Updated User Interface:

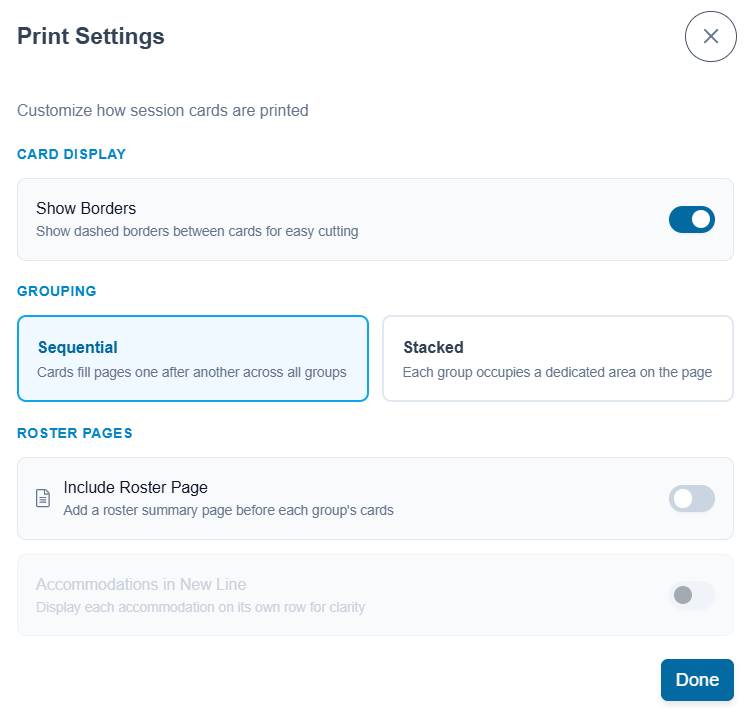
- Layout: Select 2x4, 3x6 or 1 per page.
- Card Display: Select whether to include dashed borders (guides for cutting the cards).
- Grouping: Sequential or Stacked. Select the information icon to see formatting conventions for each option.
- Roster Pages: Options to add a roster summary page before each group's cards as well as display each accommodation on its own row.
5. Select Print.
From Test Management > Administrations
Users who can view or edit administrations:
1. Go to Test Management > Administrations.
2. Locate the administration card, and then select Print Cards in the Students menu.
3. In the popup window, select the school you want to print cards for.
4. Select from the various formatting options. More options can be accessed by clicking Settings.
- Layout: Select 2 by 4, 3 by 6 or 1 per page.
- Toggle title pages for each proctor group: Select whether to include title pages for each proctor group. This prints a roster for the proctor that includes accommodations per student, the test code and proctor password.
- Toggle borders: Select whether to include dashed borders (guides for cutting the cards).
- Grouping: Sequential or Stacked. Select the information icon to see formatting conventions for each option.
- Choose Proctor Groups: Select the proctor groups you want to print.
5. Select Print.
From My Classes
Teachers can print cards from their Test Report view in My Classes. Using the Print Cards icon opens a new browser window the print modal, listing all the students from the Test Report. The student's name and the Field Set information are displayed on the cards for printing. The print modal offers various layouts and groupings for the printing of the cards.
To access print cards:
1. Select My Classes.
2. Select a class.
3. In the Class Report, select the tab corresponding to the test type (district, etc.).
4. Select an Administration.
5. Select from the various formatting options. More options can be accessed by clicking Settings.
- Layout: Select 2 by 4, 3 by 6 or 1 per page.
- Toggle title pages for each proctor group: Select whether to include title pages for each proctor group. This prints a roster for the proctor that includes accommodations per student, the test code and proctor password.
- Toggle borders: Select whether to include dashed borders (guides for cutting the cards).
- Grouping: Sequential or Stacked. Select the information icon to see formatting conventions for each option.
- Choose Proctor Groups: Select the proctor groups you want to print.
6. Select the Print icon.
From Rostering > Users
Users can generate Student Print Cards directly from Rostering > Users without subject or test code details. This option is useful for schools that organize testing groups manually on test day. It allows schools to print a single, reusable card per student instead of separate cards for each subject. Filter for the Role of "Student" in order to access the Student Card Print option in the action dropdown menu. Cards display student name and SSID — not subject or test code.
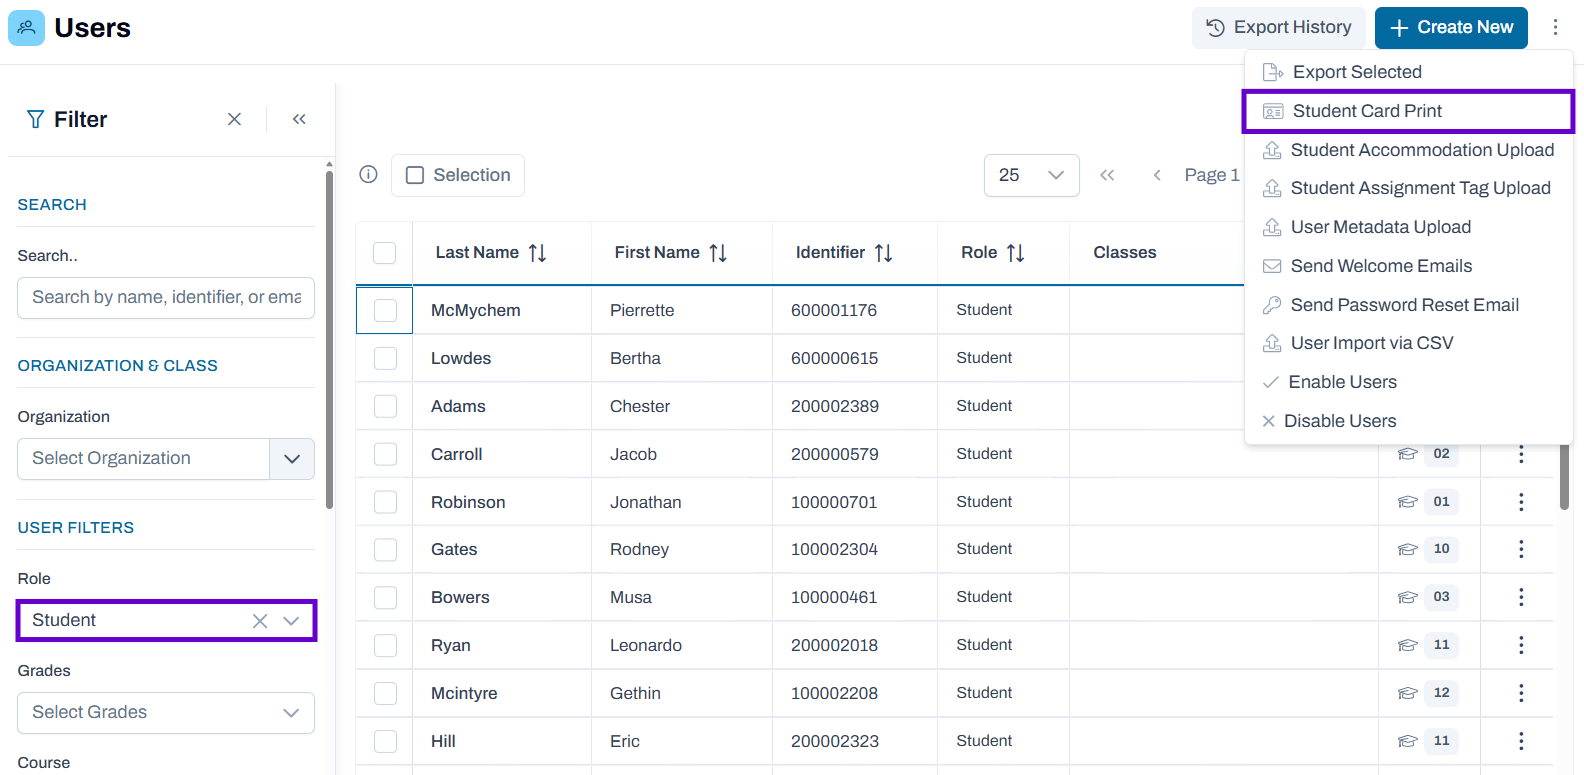
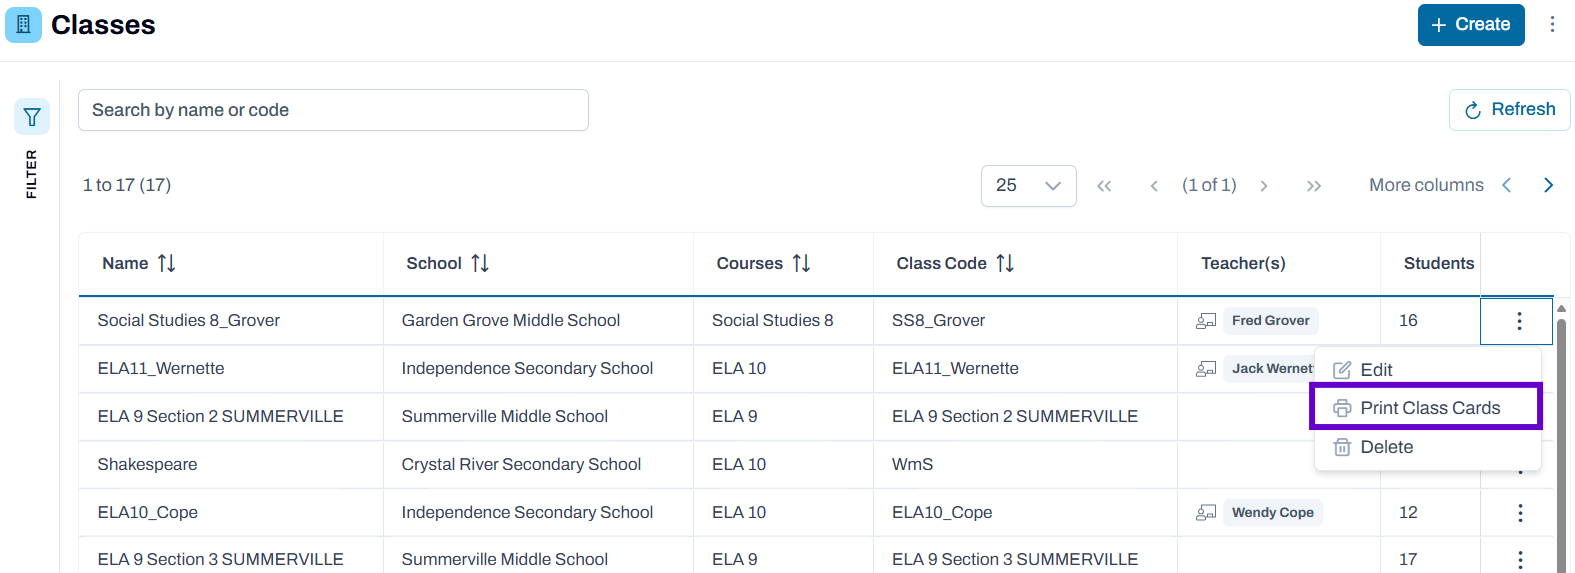
From Rostering > Classes
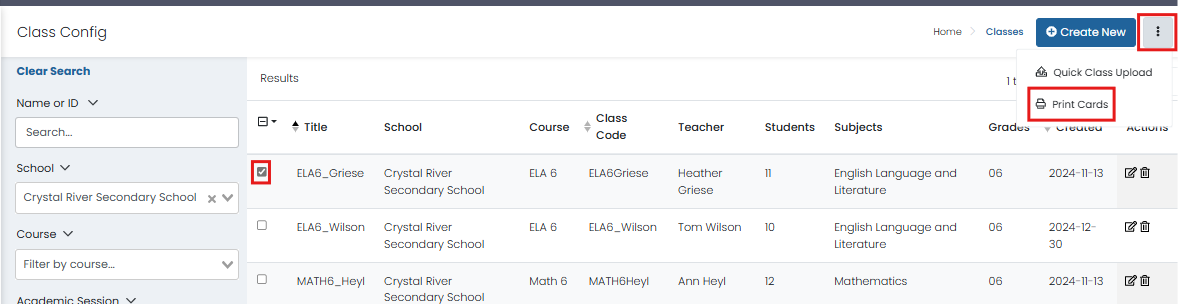
This option allows permissioned users to print a smaller subset of students. The test code will need to be provided to the student separately.
1. Go to Rostering > Classes.
2. Filter as needed to locate a class.
3. Select a class in the first column.
4. In the More menu, select Print Cards.
5. Select the Field Set to apply; this is the set of identifiers a student will have to enter to log in.
6. Select Print Class Cards.
7. Select from the various formatting options. More options can be accessed by clicking Settings.
- Layout: Select 2 by 4, 3 by 6 or 1 per page.
- Toggle title pages for each proctor group: Select whether to include title pages for each proctor group. This prints a roster for the proctor that includes accommodations per student, the test code and proctor password.
- Toggle borders: Select whether to include dashed borders (guides for cutting the cards).
- Grouping: Sequential or Stacked. Select the information icon to see formatting conventions for each option.
- Choose Proctor Groups: Select the proctor groups you want to print.
8. Select Print.
Classic User Interface:
Updated User Interface:
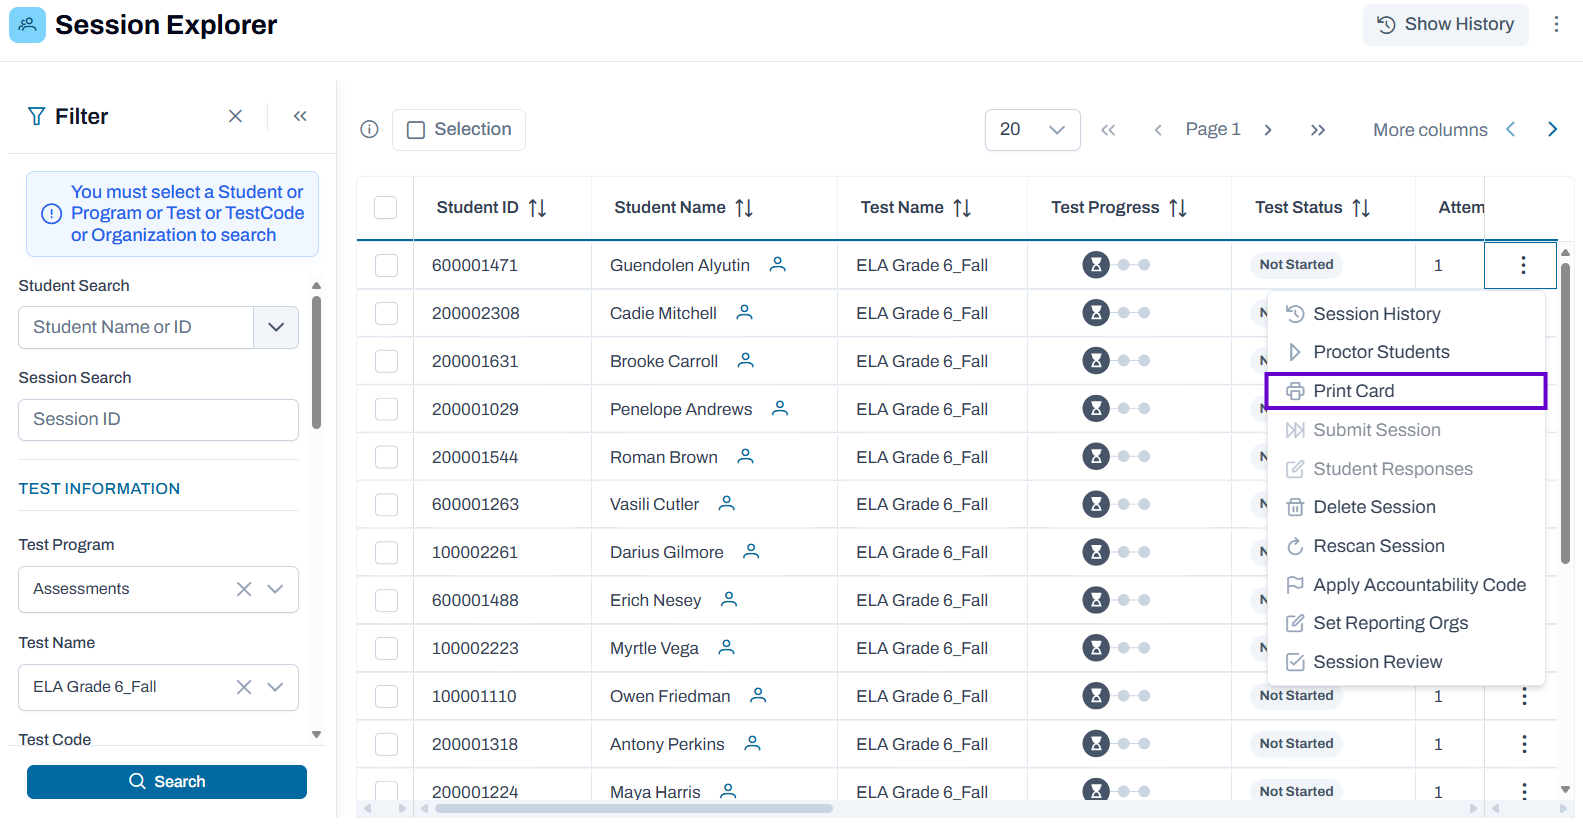
Print a Test Card for a Single Student
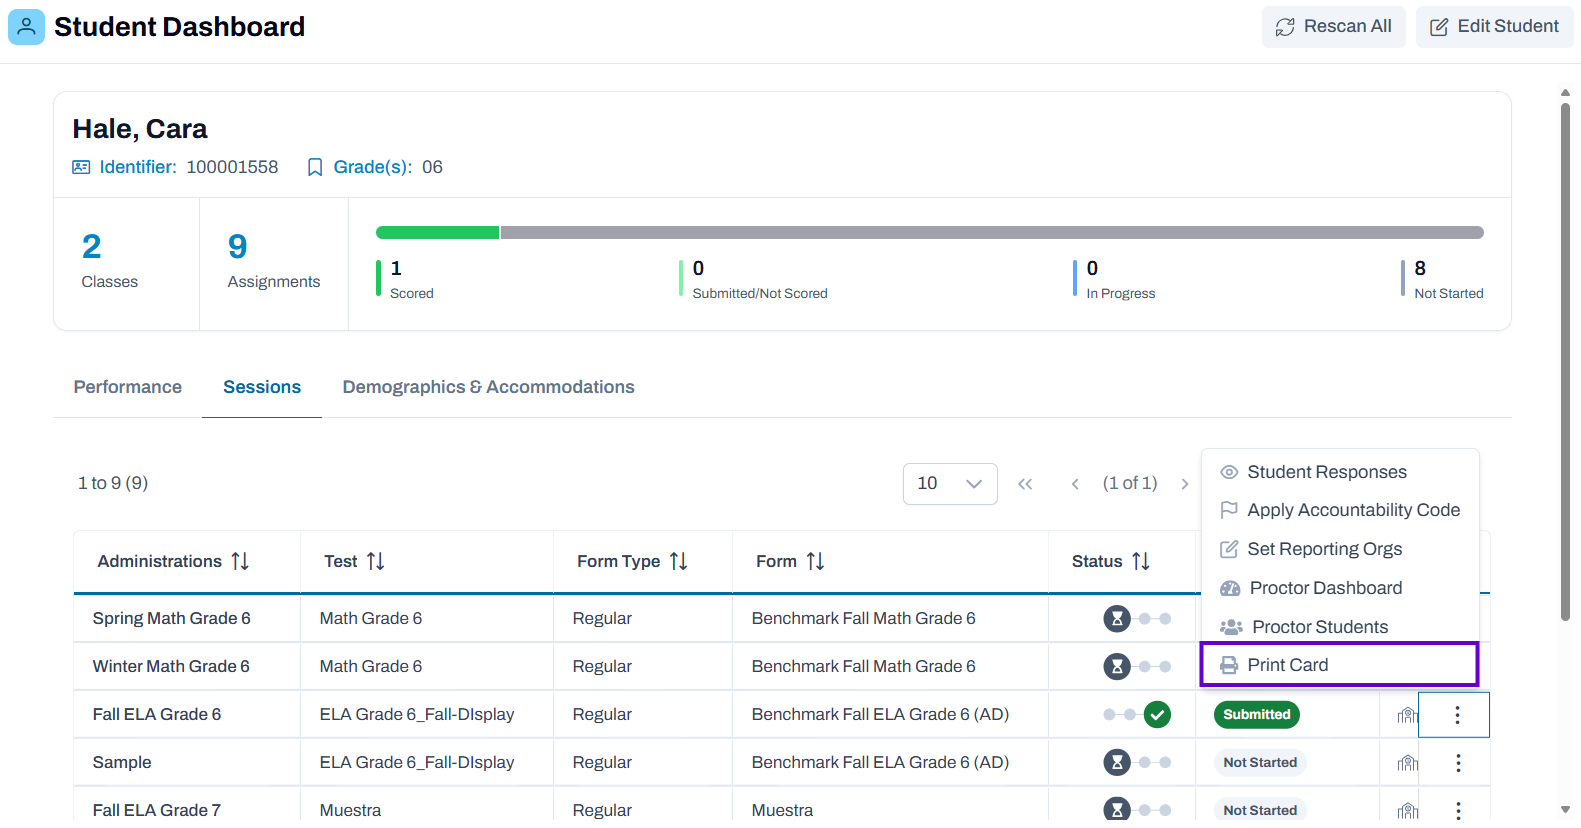
You can print a test card for a single student. If the student is not in a proctor group, the navigation will be to the unassigned proctor group page. These actions are listed under the existing Proctor Dashboard quick link in three places and do not require any specific permission setting, only permissions to navigate to the page listed:Operations > Session Explorer
Rostering > Users > Administrations
Student Dashboard > Sessions
Classic User Interface:

Updated User Interface:
Classic User Interface:

Updated User Interface: